A Documentation of My Coffee Shop Obsession

I noticed that when one scrolls down an Instagram feed, there are certain themes. Things that recur and develop a narrative if you stitch up all the matching posts. The development of a relationship, a talent, or an obsession can sometimes be traced in Instagram history.

I decided to document my obsession with coffee and coffee shops by taking screenshots of my personal Instagram account (@isagram.98, wink wink…), and embellishing it with some artwork I’ve posted in my art Instagram account (@artsyrosebud, nudge nudge…) and further decorating it with some random doodles and notes. I made it in a very long format so that one could do the ever-familiar, Insta-esque, scrolling motion.

Coffe InstaStory

the code of friendship

Coding- it’s super daunting. A whole different language that lives right in your computer.

Don’t get me wrong, I still know nothing about coding. Like, absolutely nothing.

But I got introduced to something that looks a lot like coding. Does it count? Maybe not. Either way, it made me feel cool.

Screen Shot 2017-08-30 at 3.56.11 PM

Look at that beauty. I have no idea what any of it means. But my art Professor had us open up a .jpeg image in TextEdit, and that’s what came up. All the little bits of information that the computer uses to make up the picture. Here is the original photo:

Processed with VSCO with m5 preset

These are 5 of my best friends. We like to think we’re like the TV show “Friends.” (I’m Pheobe, of course.) But that’s all probably for a different blog post.

I took this picture of them a couple weeks back and processed it through VSCO. Then I opened it up in TextEdit to see this random array of letters, numbers and symbols.

This is where the glitch comes in.

My professor taught us how to make glitch art. To mess up images to make cool irregularities.

I started deleting large sections of the code and replacing many parts with the names of my friends typed over and over. For example, here’s Tyler’s section:

Screen Shot 2017-08-28 at 11.29.41 AM

After a while of totally destroying sections of the code, the results were pretty cool.

friends-glitch.jpg
the code of friendship

Iron Man | Speed Drawing

Here’s the process of how I did my Iron Man digital painting via Photoshop. I included all the Photoshop tools and menus in the video so you can see the technical side, or you could just sit back and watch Tony Stark take shape!

Let me know if you have any requests for more characters or people you would like to see my draw!

I started with a pencil sketch of Tony, then I went over it with a pen, and scanned it onto my computer. What you see in the video is the coloring process!

Feel free to check out the rest of my channel, there’s more speed paintings (that are kinda old but oh well) and travel diaries from my Europe trip!

Enjoy!


How my Artwork Came to Hang at my Congressman’s Office

IMG_7729

Hey everyone! Wow, it’s been a while, hasn’t it? I don’t think I really posted anything in maybe a year… Whoops! I’ve been mainly focusing on my instagram account, @artsyrosebud, which now has over 1400 awesome followers (link in the menu bar!). I decided to see how my wordpress blog was doing since I haven’t gone on it in a while, and was surprised to discover people have been looking at it. So I figured, why not start posting again? Anyway, back to business. If you can call it that.

IMG_7720 copy

This happened a few months ago, but I figured I’d tell ya’ll about it anyway. I entered my drawing- the one with the girl in a sunflower field- in Congressman Sam Johnson’s Congressional Art Competition. The pieces entered were displayed in the McKinney, Texas city hall art gallery. There were 84 pieces in the show by students from all over Collin County.

IMG_7713

I didn’t win. I got second place. The first place winner got tickets to Washington, D.C., and her work is being displayed at the US Capitol for a year. I’m trying again next year, but for now second place is great. I got a fancy certificate, a fancy US flag that had been flown over the US Capitol in my honor, and like I said, my work will be hanging at the Congressman’s fancy office for a year. One of my friends joked that I got second because the Congressman liked my work the best and wanted to keep it to himself.

IMG_7788

See? Fancy.

IMG_7724

I read up on Congressman Sam Johnson, and found out he is one of the few members of Congress who fought in combat. During his 29 years in the US Air Force, he survived 7 years as a Prisoner of War, and 42 months in solitary confinement. He is 84 years old.

IMG_7716 IMG_7736

All in all, it was pretty successful I’d say. It was a fun night, some of my best friends and my family came to support me. They’re pretty awesome.

Drawing a See-You-Later present

So, my friend Brittany just graduated from college and is moving to China for a year as a missionary. I’m going to miss her so much, but I decided to do this quick drawing as a see-you-later present.

First off, I chose a picture I wanted to draw and did a really faint, rough outline. It all just starts with circles and oblongs, and I usually just go over it with more and more detail until it’s an outline I’m happy with.

Screen Shot 2014-08-12 at 3.48.47 PM

Next, I went in with a thicker black outline. This is where it’s really important to get the facial features right. I also added the creases in her clothes and the flowers in her hair.

Screen Shot 2014-08-13 at 10.32.31 AM 

The next step is my favorite part- adding the color! This is the part where you have to really look closely at your reference picture for all the variations in hues-where the darks and lights are- etc. Since I had already put in the black outline, it’s kinda like working on a coloring book- but shading at the same time.

Screen Shot 2014-08-13 at 10.36.02 AM

Just keep adding color… I think in this stage I sort of removed the black outline to see what it would look like if I just outlined each section with a darker color. For example, her shirt is white, so I outlined it with grey. Her skin was tan, so I outlined that with a dark brown. I think this is what I went with in the end.

Screen Shot 2014-08-13 at 10.57.59 AM

The hair is the trickiest part of coloring. My tip is to just make sure your brush/pencil is set really small. Treat each stroke like a strand of hair, and just keep layering. It takes practice.

Screen Shot 2014-08-13 at 11.26.56 AMScreen Shot 2014-08-13 at 11.35.46 AM

Brittany portrait

Here’s the finished product! Comment what you think, and please follow me!

My First Charcoal Attempt inspired by Eleanor Calder!

I’ve tried lots of mediums, but not charcoal yet. I’ve been wanting to take a wack at it, but I just never have until this week. My art teacher supplied me with all different kinds of charcoal sticks, pencils, and paper. I got to experiment with all that, and I rather like what I came up with.

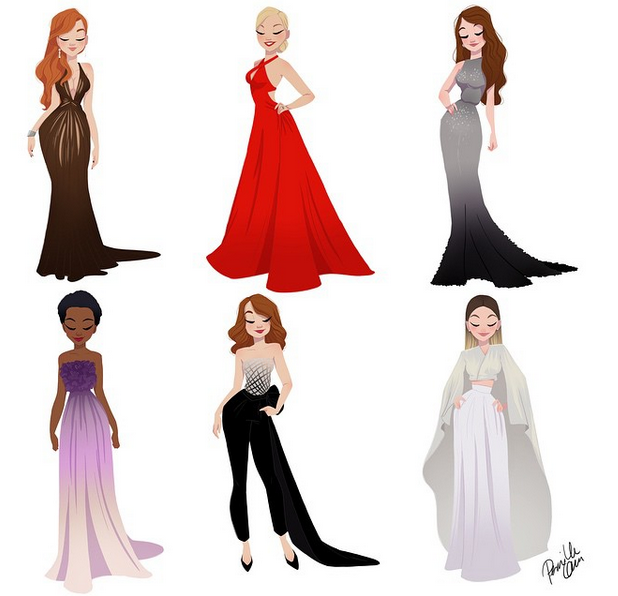
But first, who is this Eleanor Calder girl? She’s most known as the girlfriend of Louis Tomlinson from One Direction, but she really is just an average, extremely beautiful girl who goes to the University at Manchester. She is considered by many as a fashion icon. She’s even got a fanbase. Her fans call themselves “Calderics”. Plus, the girl is just so sassy when people send her hate. She has more than 3.7 million followers on Twitter, and has been ranked 27th on a list of influential British Twitter users.

Anyway, she’s just one of those people that I really wanted to draw.

See, that’s the thing about artists. Some of us can be kinda creepy. We see someone’s picture, or even just a stranger eating lunch, and think, “Wow, I wanna draw your face.” This may or may not involve staring for a weird amount of time, or in my case with Eleanor, looking her up on Pinterest. I just like certain people’s faces, okay?

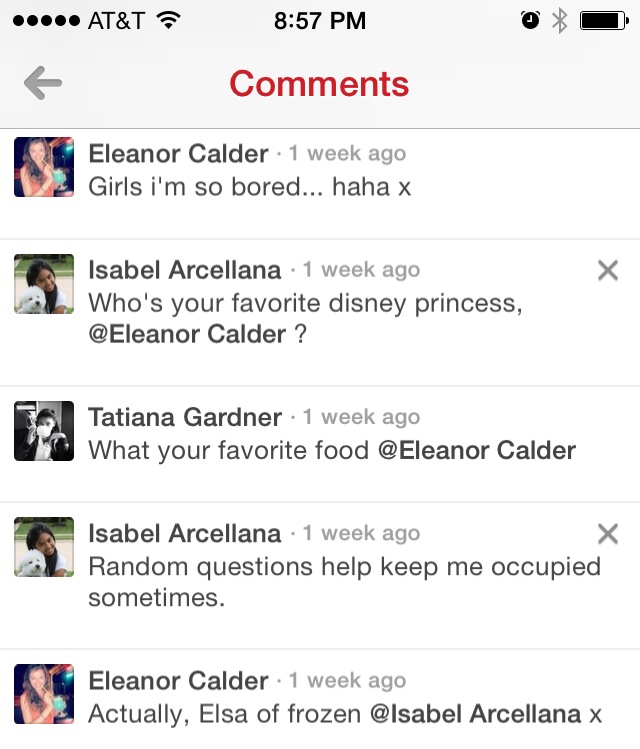
Well, I was commenting on one of El’s pictures on Pinterest (I pretty much live on Pinterest, just to let you know), and guess what? She responded! I was kinda fangirling.

photo


So, yeah. But what’s that got to do with charcoal? And why would I ask her that question? Okay, knowing what someone’s favorite Disney Princess is a very important piece of information for me.

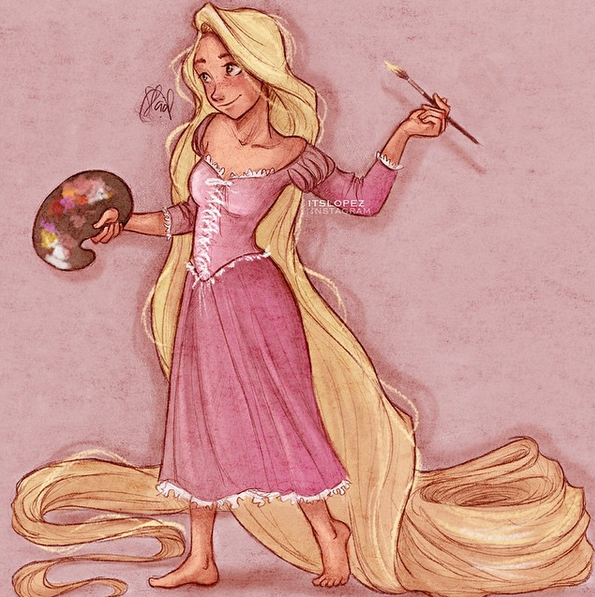
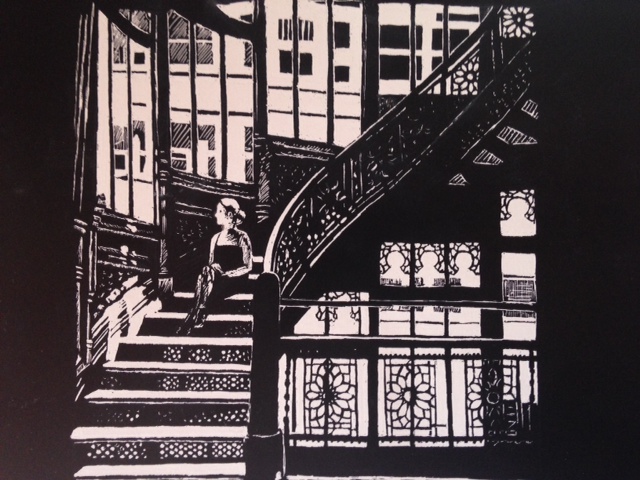
After we talked about Disney Princesses, other fans started telling her she looks like Belle. She agreed, saying, “I’m Bell, but shhhh, is a secret! Xx”. So that kinda got me thinking to make a Beauty and the Beast-inspired drawing using her face.

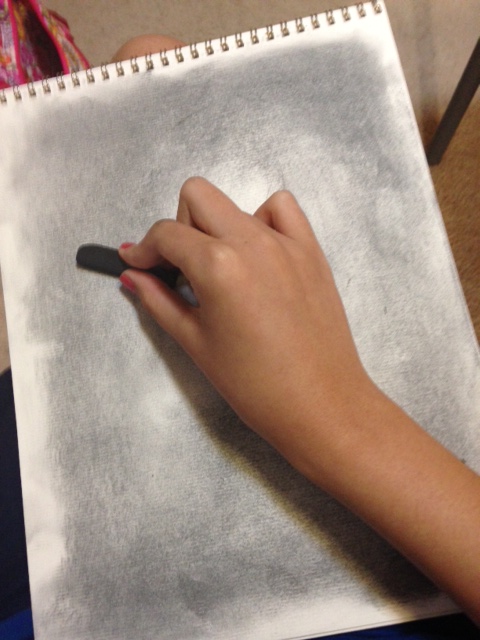
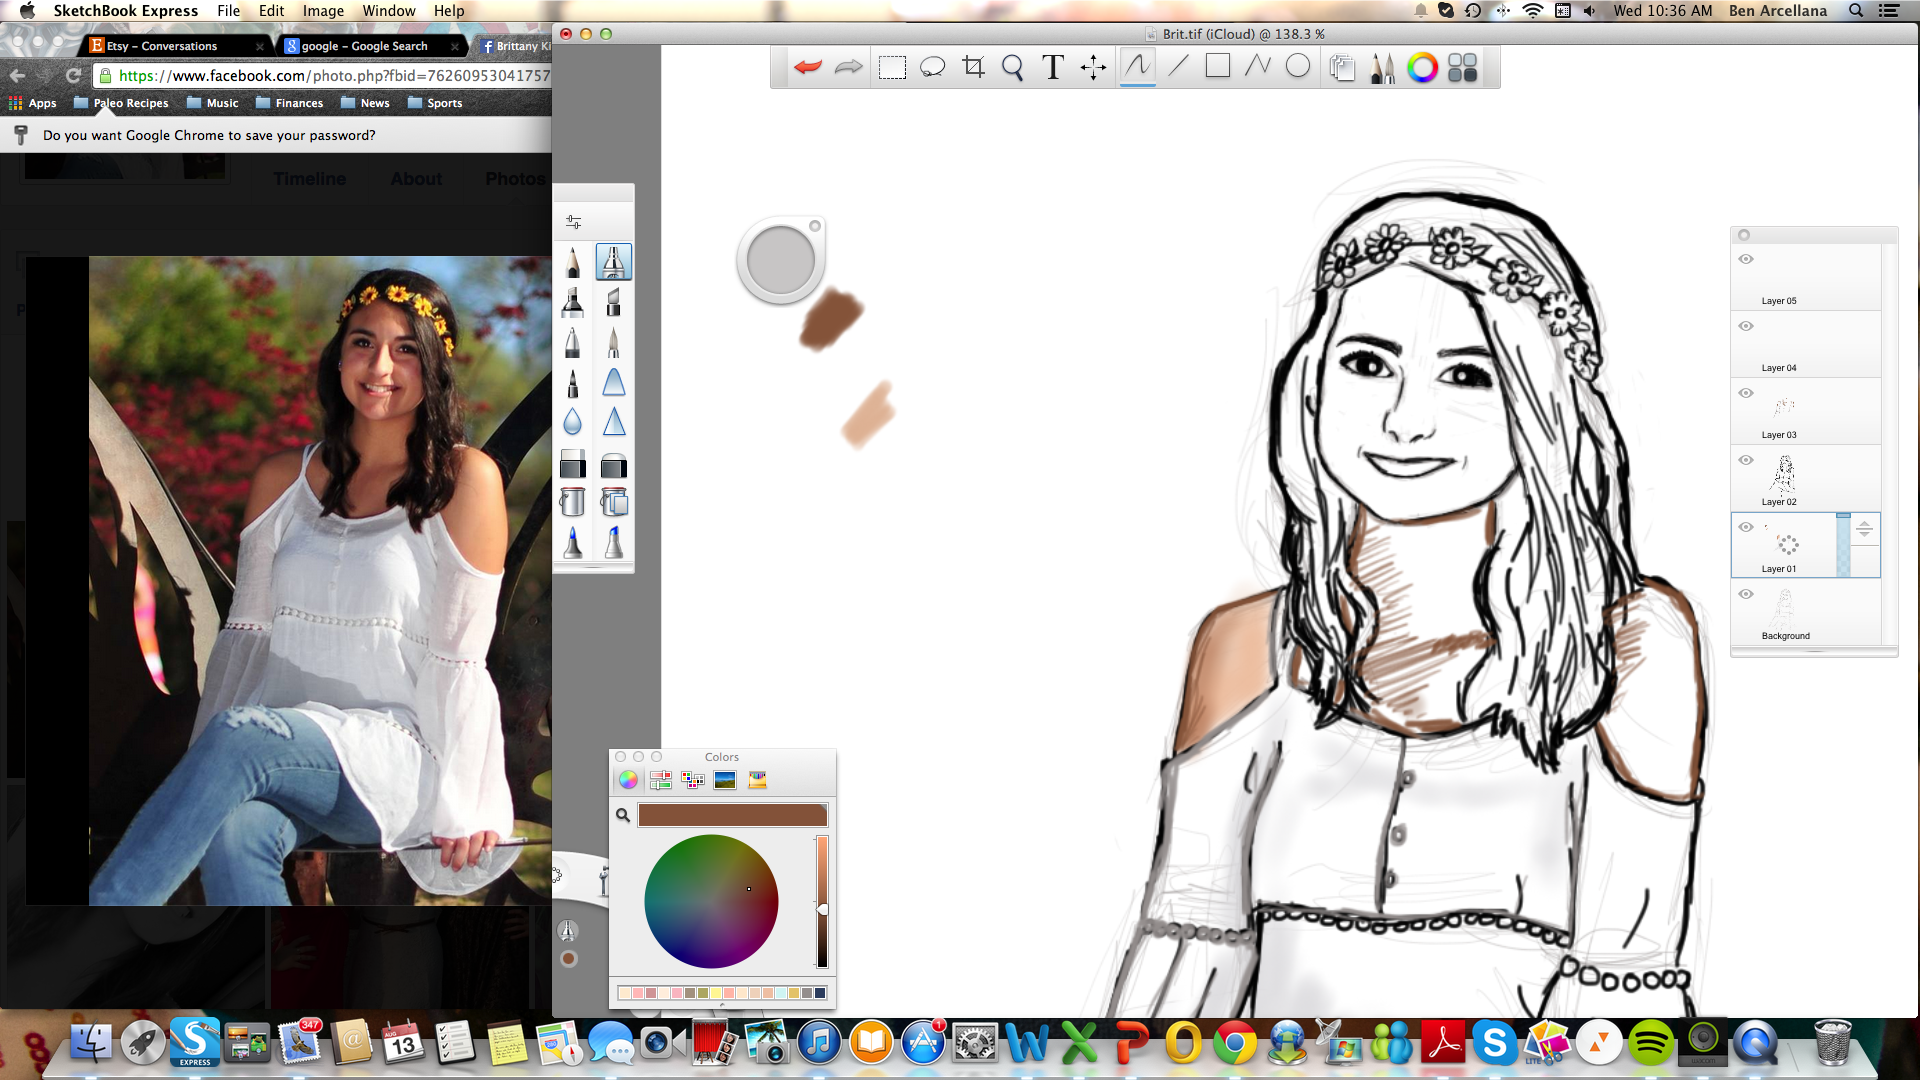
So what I like about charcoal is that it’s really forgiving. I pretty much just went crazy with a charcoal stick and spread it around the paper pad my art teacher gave me. I made sure to leave a light spot where the girl’s face would be.

photo 1-3   photo 2-3

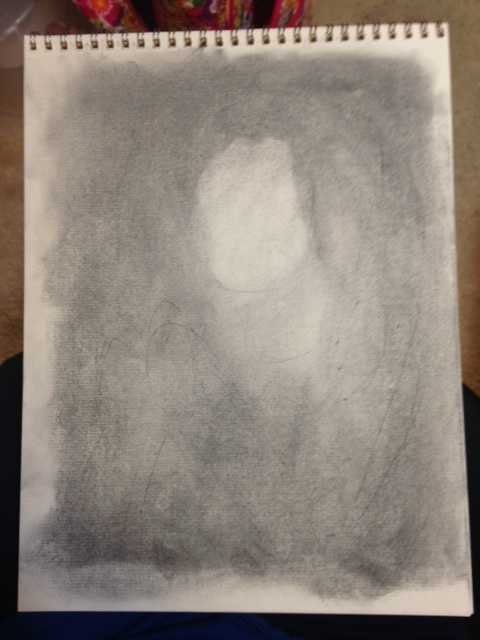
And next, I added in more detail. I wanted to make sure her face was perfect before I got started on the rest of her.

photo 3-3

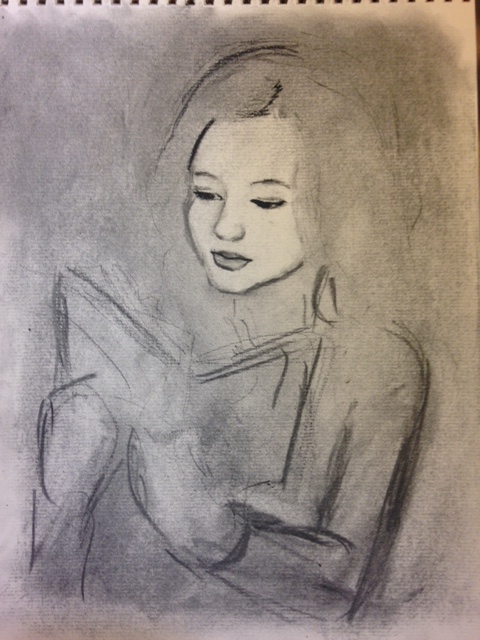
And then I added a book. In the picture of Eleanor that kinda inspired me, she was holding her phone and taking a picture. But I decided to put a book in her hands instead.

photo 4-2 photo 5-1

Again, charcoal is so forgiving. Just get a gum eraser, and it lifts most of the charcoal off the paper. Any lines you made that you don’t want, you can just smudge into the background. As you can see, I was very rough with the sketching, but was a lot more detailed as I went in to refine the drawing. Just take it by layers, adding in more and more detail as you go.

photo 2-2photo 3-2

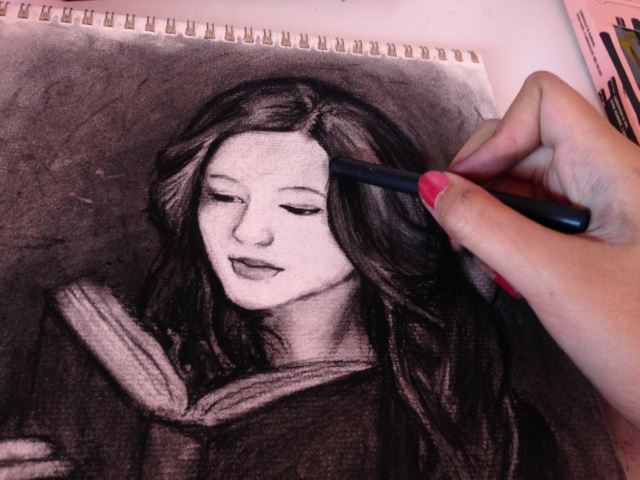
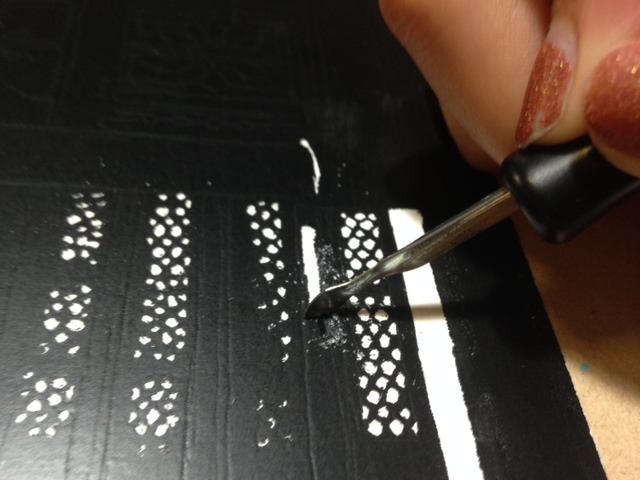
There’s my desk (I just cleaned my room, so I can actually SEE my desk, woohoo!!!) and my plush pencil that my sister made for me. Isn’t it cute? And then there’s me in a shirt I refashioned (by the way, if you want to see me refashion something, comment below!) And there’s my messy hand. Charcoal is VERY messy, but I like that. That’s just a little of how messy you can get your hand.

Tip: Have a wet paper towel nearby to wipe your fingers on. But don’t get your paper wet!

photo 5 photo 4-1

And.. vwala!!!! (Is that how you spell it?)

Now, I didn’t try to copy El exactly, she was just an inspiration, and I kinda just liked her facial expression. But I love how it turned out. I’m working on a portfolio for college, so I can’t do any copyright things. The rule is to change a picture %30 I think, so I can’t really do fanart. So this is kinda my way of doing it, I guess? Anyway, I absolutely LOVE charcoal now and intend to use it a lot in the future.

Hope you like it!

Let me know in the comments below, what celebrities do you like drawing? Anyone’s faces capture your attention?


Scratch Art Tutorial

Some of you might have seen my first scratch art piece on the “Portfolio” page. That was one of my very first art pieces that I did when I started art class. Since then, my art teacher likes going around and showing her other students what she calls “The best scratch art any student of mine has ever done”. And that’s a lot, since she’s been teaching kids for decades. This is my reaction on the inside:

aw shucks

(I really like the Sprouse twins, so I couldn’t pass up that gif.)

So it’s been a couple years, but I did another scratch art!

Tip: When you look for a picture to do for scratch art, make sure there’s LOTS of contrast. In black and white form, it should be as close to just black and white as possible. Make sure there aren’t much greys in the picture. This makes life so much easier.

So once I found a good picture to do, I printed it out.

Tip: Print out your picture in the exact size you want. Then tape it (with masking tape or painter’s tape so it doesn’t peel your art work) on to the actual scratch art paper, the picture you printed facing up.

Here’s what mine looked like with the piece of paper taped on it. This is how to outline your scratch art drawing. Make sure the picture is on the exact spot where you want your image.

photo

Tip: To outline your scratch art, use a colored pen. Press down on the paper hard to outline the details you want to scratch. Using a colored pen helps let you know what you’ve already marked and what you haven’t. This should leave marks on the actual scratch art paper. Once you have marked the whole picture, remove the piece of paper and you should see that your scratch art paper has markings that you can use as an outline.

Once I finished pressing down with a colored pen, here’s what it kinda looks like and here are the things you need to get started scratching:

photo 1-1

You can kinda see the pen markings here. And also, obviously you need something to scratch with. I have a simple pen holder and three scratch knives with different tips. A smaller, sharper one for details, and a couple bigger ones to cover larger areas.

Tip: Make sure you have a practice sheet! Scratching takes practice, so test out your tools first! And if your pen isn’t scratching easily or effortlessly, you’re probably holding it wrong. It should scratch smoothly.

photo 4


Tip: Unlike pencil, you can’t really undo or erase scratch art. So BE CAREFUL!!!! If you really messed up, try using a black pen to cover any mistakes.


photo 2

It takes practice and patience, but it’s lots of fun!

Thanks for taking the time to read this! And if you want me to do more tutorials, please let me know in the comments!

A New Technique- my new art piece “A Light Sleep”

Here’s an art piece I did using black, white, and grey colored pencils on this tan piece of paper. I let some of the paper show through, which I thought was kinda cool. Here’s the finished product!

Tip: Instead of doing a black and white drawing on white paper, change it up! Draw on colored paper, and let the color of that paper show through. Use the colors in the paper to give you a nice effect!

Colored pencil
Colored pencil

It’s Summer! More time for Art!

So, by now everyone probably knows I draw A LOT. I actually didn’t really realize that it’s not normal for a teenage girl to spend so much time with colored pencils and paper. But this thing called High School has been preventing me from getting a lot done. Between school assignments and trying to maintain a social life, my paints have been poorly overlooked.

Until…

summer

Yay!!!!! It’s SUMMER!!!!!!! (Sorry not sorry for the High School Musical gif.)

So, when most kids think of summer as a time to relax, I kinda see it as a time to GET THINGS DONE. I have so many projects I want to do, so many things I want to try, hobbies I want to start, and things I want to master. Not to mention a blog that I haven’t really been writing as much as I want to.

This summer, I will get back to the blog. For those, if there are any, people who have missed my blog posts, sorry! I’m posting twice today to make up for that. Or thrice. Yeah, thrice. Boom.

Have a great summer! Make the most of it!

Prepping for Prom

A couple years ago, my mom and grandma drove me and a couple of my friends to our church camp. On the way, we stopped by this really cool Sonic with retro phones. My mom took pictures of my friends Lindy and Lacy ordering their food. I changed the pictures up a little bit and made it a prom story.

The girls are colored pencil, and the background is in watercolor pencil.Image

Happy Birthday Jesus!!!!

Merry Christmas everyone!!! 

This year, I was fortunate enough to get a Wacom Intuos Pen tablet. I love it!

Image 

First thing I drew: Hermione, of course!

Image

I love the Wacom pen tablet. It’s so easy to use, and feels great. It makes drawing with a mouse feel like drawing with a bar of soap! This thing makes drawing on the computer sooooo much easier.

Image

Here’s the finished product!